


The post is contained mainly by two parts. The first part is the content of Renault CAN Clip V146 new features and the second part is CAN Clip V146 Step by step installation with full pictures.
The Renault Can Clip V146 is from uobdii.com.
$124 +shipping (SP19-B)
http://www.uobdii.com/wholesale/renault-can-clip-latest-diagnostic-tool.html
Newest one $119 + shipping (SP19-C) with different PCB board:
http://www.uobdii.com/wholesale/renault-can-clip-c.html
Renault CAN Clip V146 New features:
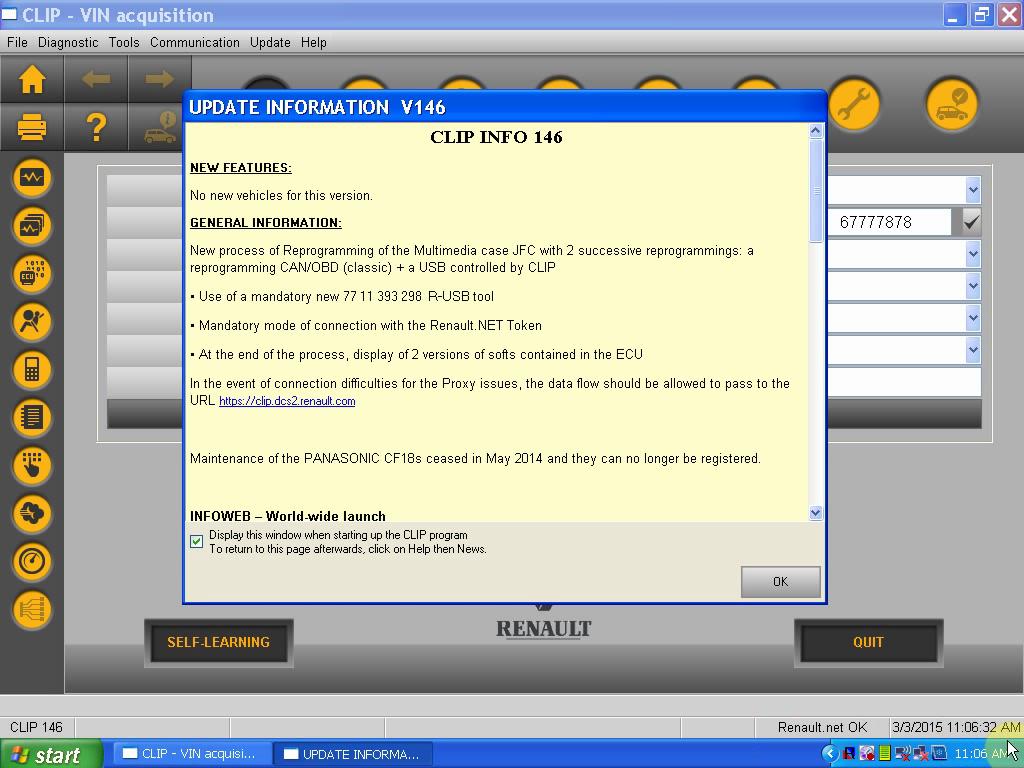
CAN Clip V146 Step by step installation:
Can clip V146 installation Video: https://www.youtube.com/watch?v=Kb79AeTHsys
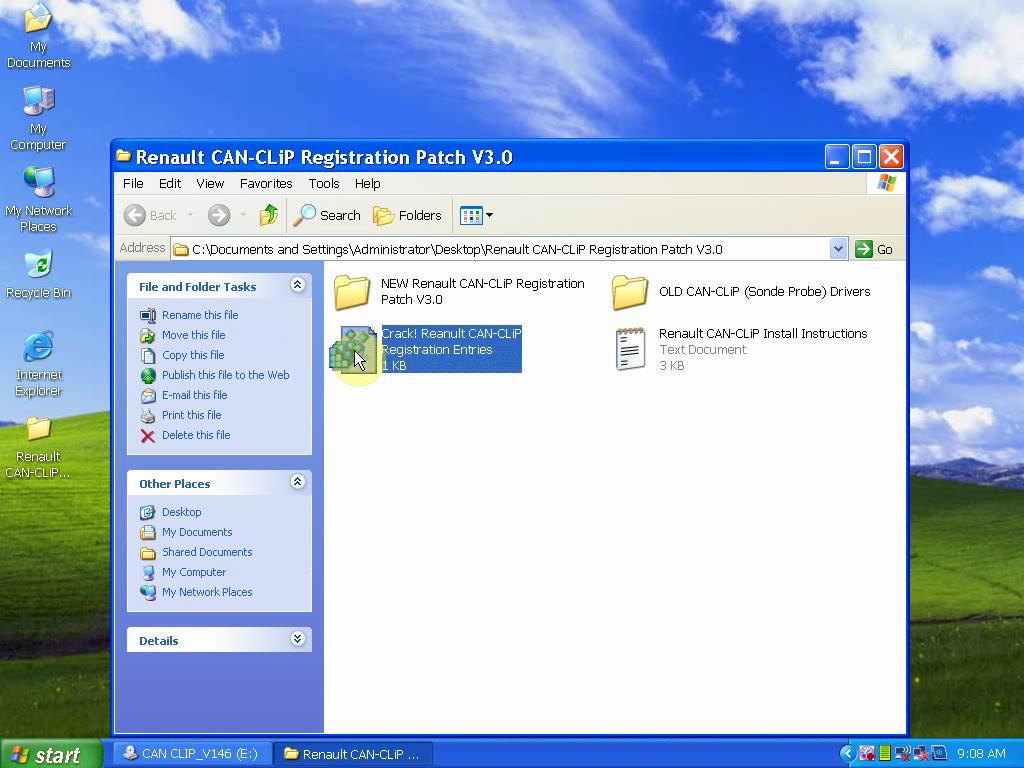
Part1. Renault CAN-Clip Registration
1). Insert DVD Can clip_V146 into computer, open “Can clip_V146(E:)”, copy “Renault CAN-CLIP Registration Patch V3.0” and paste it on the desktop.

2). Open “Renault CAN-CLIP Registration Patch V3.0″ on the desktop, right click” Crack! Renault CAN-Clip Registration Entries” and click Merge.
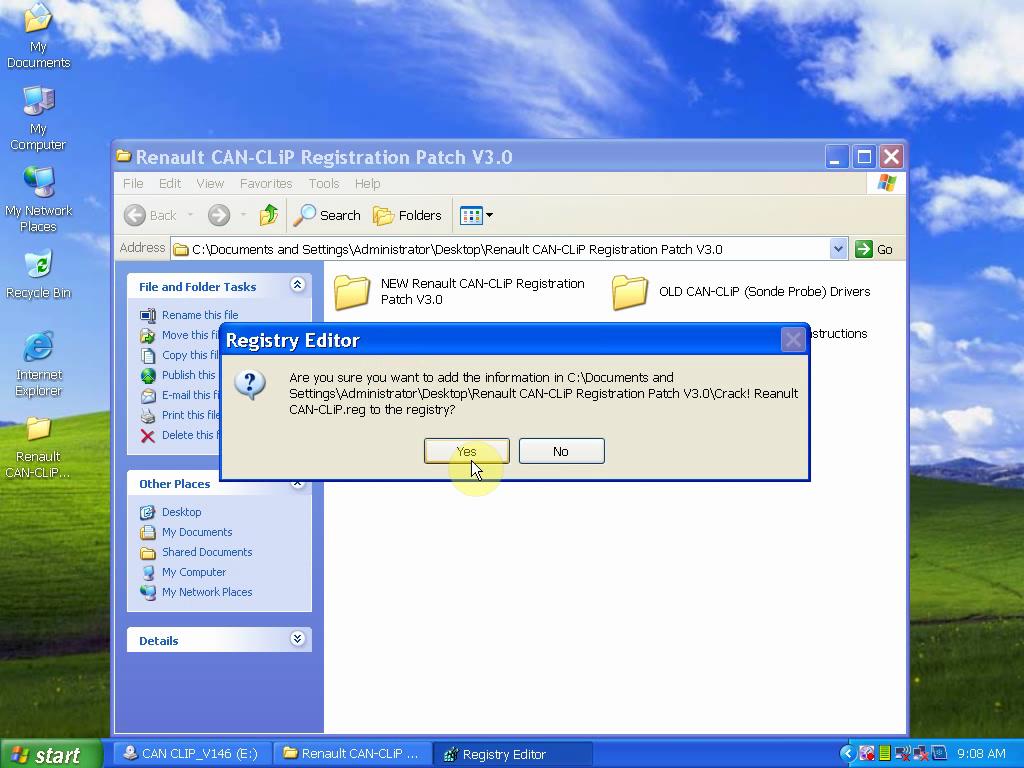
3). Click “Yes” to make sure registry.
4). Click “Ok” to confirm Crack! Renault Can clip.reg has been successfully entered into the registry. Exit.

Part2. Renault CAN Clip V146 Setup
1) Go to “Can clip_V146(E:)”, right click “Setup” to open it.

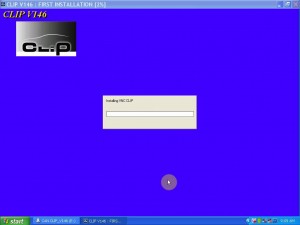
2) Click “First installation”.

3) Tick off “I accept the terms of the license agreement”.
4) Select your country and language
5) Select “Renault” as default
6) Installing VNC CLIP
7) System automatically install untill you get a windows reading “Welcome to the Windows resource kit tools setup wizard”, click “Next”.
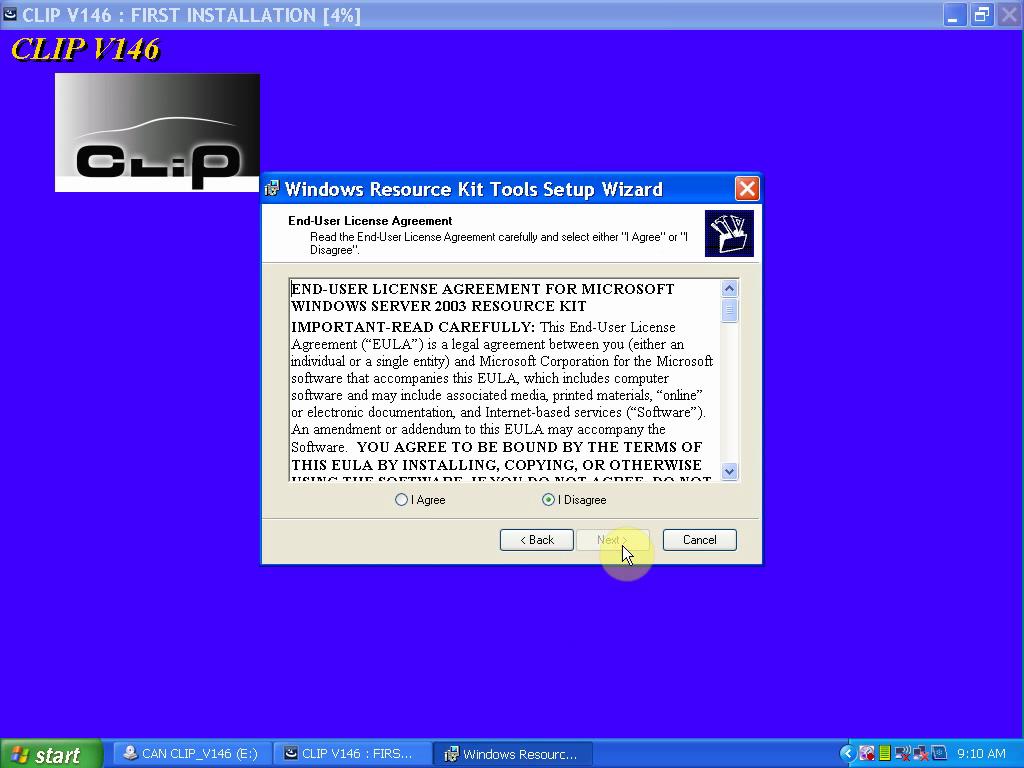
8) I agree “End-user license agreement”, click “Next”.
9) Supply your user information, click “Next”
10) Choose Destination directory and click “Install now”.
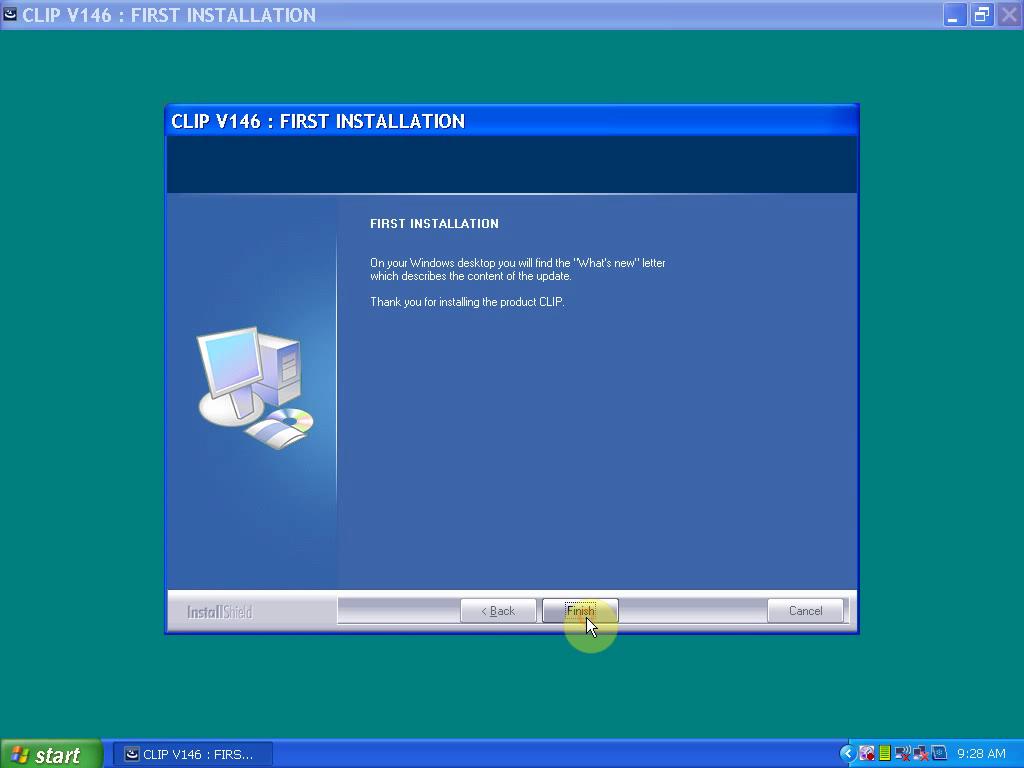
11) Completing the windows resource kit Tools setup wizard, click “Finish”
12) Restart the computer.
13) Install Microsoft Windows, it might takes several minutes. Then automatically install some other application programs.

Restart the computer
14) Setup- PDFCreator, please wait while setup installs PDFCreator on your desktop.

Finish first installation.
Part 3: Clip Registration/ deal with RSRWin
1). Right click folder “Renault CAN-CLIP Registration Patch V3.0” on the desktop, open it.
2) go on open folder “Renault CAN-CLIP Registration Patch V3.0”, it contains “read me.txt”, “Can Clip registration steps” and “RSRWin”

3) Right click icon “Clip” on the desktop for properties, click “Find target”

4) Cut “RSRWin” and paste it on the desktop

5) Go to the folder “Renault CAN-CLIP Registration Patch V3.0”, copy “RSRWin” and paste it into “C:\CLIP_X91\Lib\Application”, then open it.

6) You must register your Clip, it will pop up a window reading “Are you part of the Renault Network?”, click “NO”.

7) Please enter here the unlocking code you are given by the SPX Helpline.
Use this Key for Registration: 333DEF-111DEF-111DEF-222DEF-221DEF-000DEF
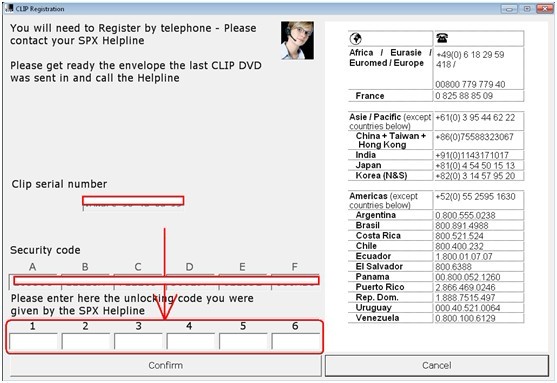
8) Registration successfully

Part 4: Plug Plug Can clip interface into the computer
Plug Can clip interface into the computer via USB port, then get message ” Found New Hardware wizard”, click Next to finish.
Click “My Computer” – “Management” – “Device Manager”, then find out “Bosch Automotive Service Solution Device”, it means Clip has a good communication with your computer.

Part 5: diagnose Renault with Clip.
1) Open icon “Clip” on the desktop.
2) After some application automatically complete installing, input vehicle information, then click “Computer Test”

3) Computer Test

4) Select function in the menu.

5) Selct “Faults Test”

Continue operating ……
Done
Hope it helps.
