The blue screen solution can be used on Digiprog 3 odometer correction tool (Item No: V4.88 SM33-C & V4.94 SM47-E/SM47-F). Please contact uobdii.com customer service to get repair chip for free. Then follow either of 2 solutions below.
Method 1: Digiprog3–101W(X1) Solder Operation Way
- Cut off the connect cable on the 5pin pad (note: cut via reverse) Then use multimeter to test 5pin and R10 which is far away from the point of X1 end–If open circuit is not ok, then means cut off the connector successfully.
- Solder X1 to the pad (note: reverse welding)
- Connect the point which is the end of R10 which is far away from 101W(X1) and the cable and X1-2 pin.
- Take off the fly cable between C30 and X1
- Take off the IC on the X1 Replace the IC
- Connect the new IC Connect the fly cable as the original situation
Note: the original point of the IC is on the upper left corner, against C30. (Red circled place is chip pic of STC15F: 10W H85330 8AB)
Method 2: Repair Digiprog3 update failure – a blue screen.
Sure, many people wonder how to fix DP 3 (blue screen) after a failed upgrade, or whether it is at all possible. The answer is yes, it is possible. I’ll tell you how to fix it yourself, the problem of blue screen.
If you see this screen (as pictured below) after the software update Digiprog 3 do not panic, in most cases, you can fix it.
1.The reasons of appearance, blue screen.
- a) The first and most common cause of blue screen is the inappropriate update Digiprog 3.
We must remember that updates are created for the serial number. The serial number of the update files must = Digiprog 3 serial number. Otherwise, upload the files to another serial number gives us the effect shown in the picture above.
- b) Another cause of the blue screen may be interrupted during the upgrade of communication between your computer and your device digiprog3.
- c) Other causes unrelated to update the device
- How to fix the device after a failed update.
To repair the unit we will need:
- a) Update files with the corresponding serial number = serial number of the device.
- b) Programmer serial memory for example, willem.
Ok, so we begin. We will have 3 digiprog undress and get into the PCB, exactly 2 serial memory.
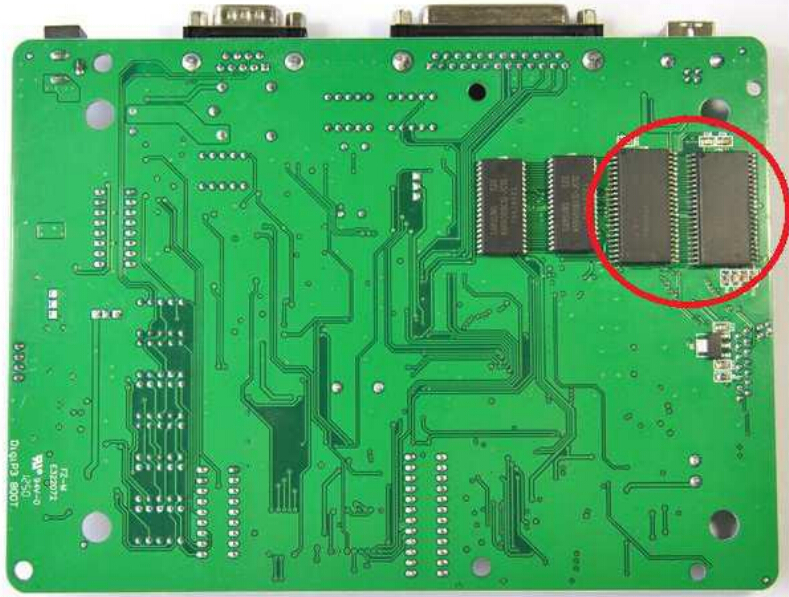
You will see a such a view:
Us interested, memory, marked in the picture above. Are respectively a memory U1A and U2A. These are the memories that are 22, feet on one side, which is 44, feet the entire memory. We remove the memory U1A from the plate and put in the programmer.
Load a file content digi1.bin, to memory U1A.
Then again put memory on the board.
Do the same with memory U2A. Only here to load file Digi2.bin
Then again put memory U2A on the board.
Preferably before each update, do yourself a copy memory dumps U1A and U2A. Then we can go back in case of problems with the update to the old version.
U1A = Digi1.bin
U2A = Digi2.bin
Twirl, back digiprog. After this step, run digiprog. If everything went well that you will be greeted this image.
DigiProg 3 Ram
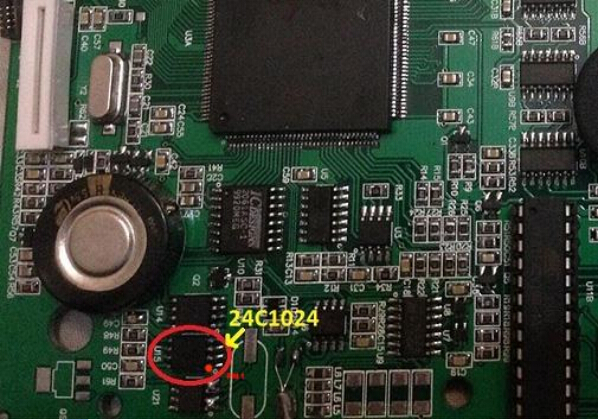
EEprom Digiprog 3 24C1024

The serial number is stored in the file digi1.bin exactly at this point:
For example, the serial numbers:
C0BE9E0B0000 = D2 CC D0 16 0F 1A 6F F1
61C828170000 = CE 5B 56 C6 3F 16 8D 14
F6C428170000 = 87 98 FA 4E 3F E0 59 56
668206110000 = 44 5B B6 EB 2A A3 D6 1C
3AC928170000 = CF D5 60 29 93 B3 DA D2
Any change in the file, making it not useful after update, blue screen on digiprog 3.
The problem is probably in the checksums of the files after editing change. Maybe someday will a program that will allow changing the serial number in the file update. Then buy only 1 time updates and will be able to change the serial number in the file. Those who sell the updates are, surely such a program.
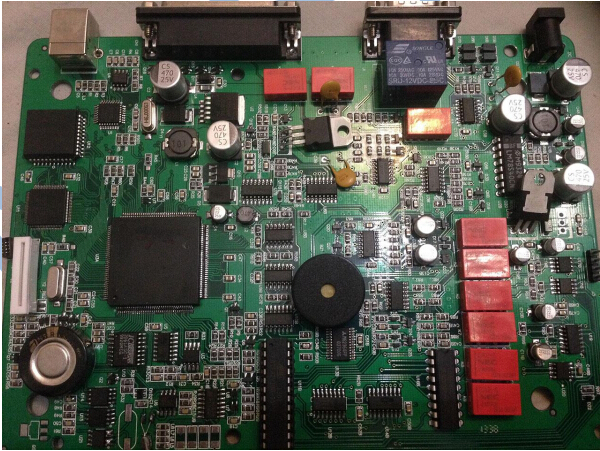
Platine Digiprog 3
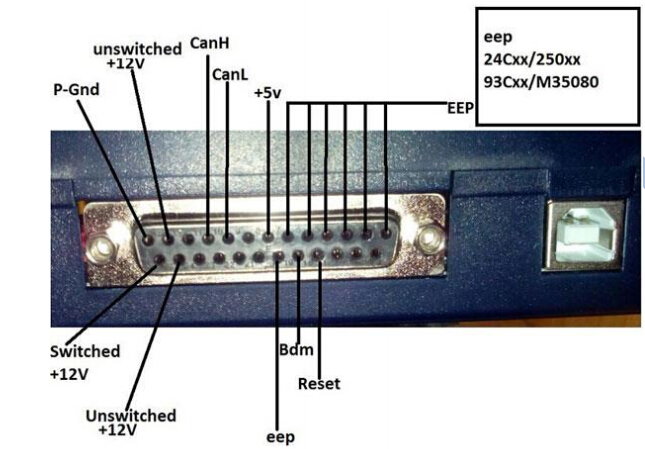
Digiprog 3 cable pinouts

![] 2024 Xhorse VVDI MLB TOOL XDMLB0 Key Programmer ] 2024 Xhorse VVDI MLB TOOL XDMLB0 Key Programmer](https://blog.uobdii.com/wp-content/uploads/2024/06/SK430-1080.jpg)


