Most users install OPCOM on windows XP, but have no idea on how to install on WIN7. Then, the successful way to install OPCOM on win7 is necessarily to share; the following parts list a full installation guide. Some users might use other ways of doing the install, but this way worked perfect for us. Please be sure to follow the installation guide EXACTLY as you see it in the following parts, even missing out 1 of the steps can result in the software not installing correctly.
OPCOM OS requirements:
Space requirement: around 15mb
OS requirement: Windows XP, Windows Vista or Windows 7.
Note: we have successfully applied this guide to XP, Windows 7 and Windows Vista.
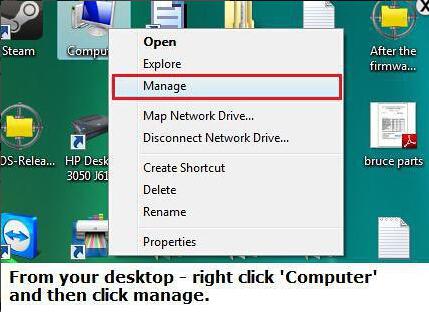
Step 1: From your desktop – right click “Computer” and then click “Manage”
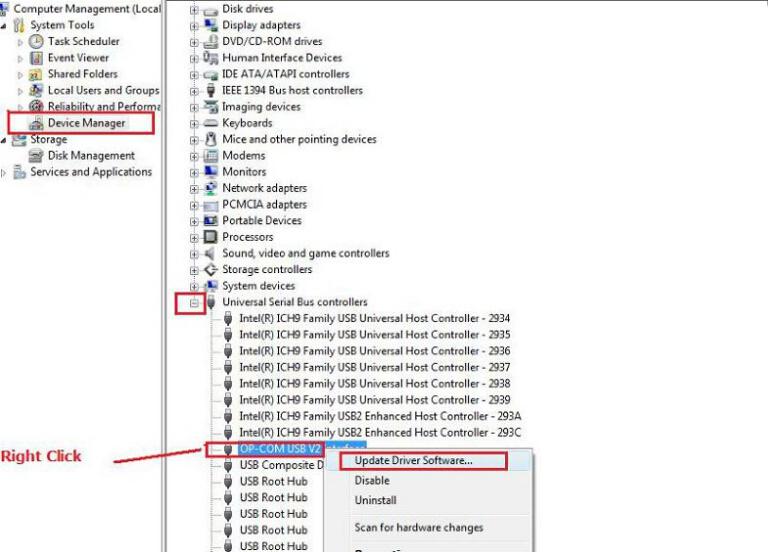
Step 2: click “Device Manage” – “Universal Serial Bus controllers” – Right click “OP-COM USB…” choose “Update Driver Software”.
Step 3: Insert the software CD.

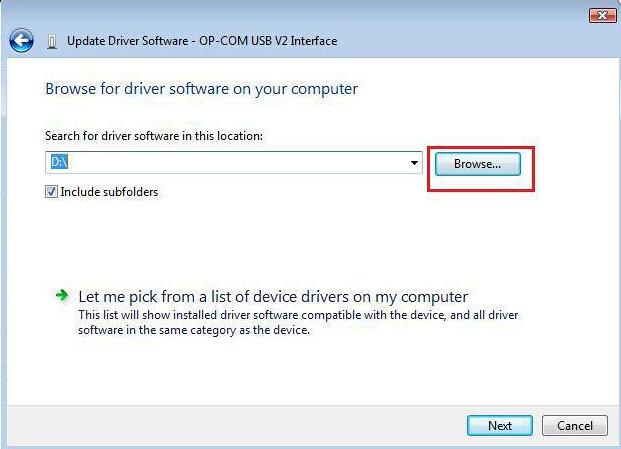
Step 4: choose “Browse my computer for driver software”.

Step 5: Search for driver software in this location, click “Browse”
Step 6: choose “DVD Drive(D:) OP COM”, click “OK”
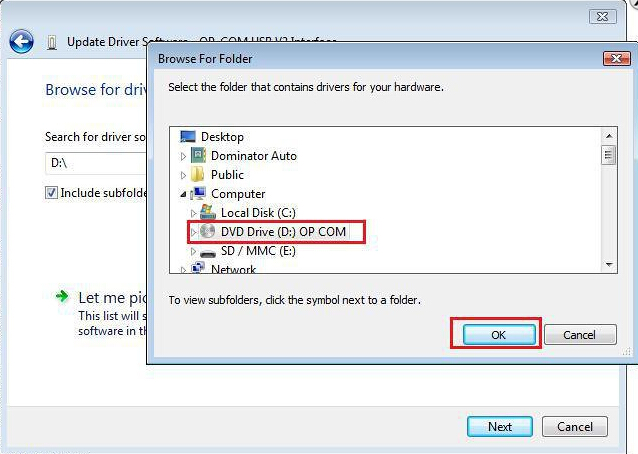
Step 7: click “Next”.

Step 8: Installing driver software

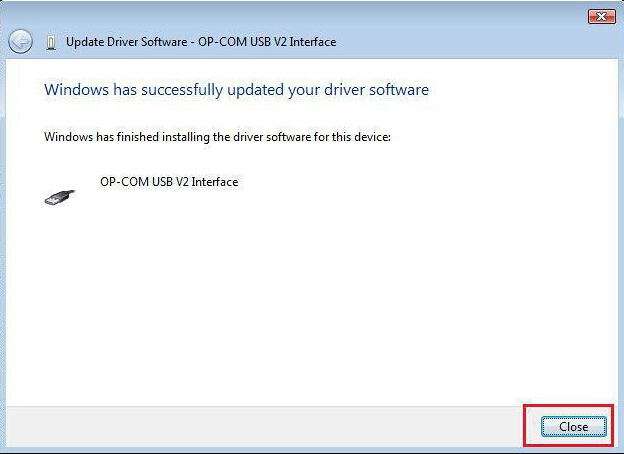
Step 9: Windows has finished installing the driver software for this device, click “Close”.
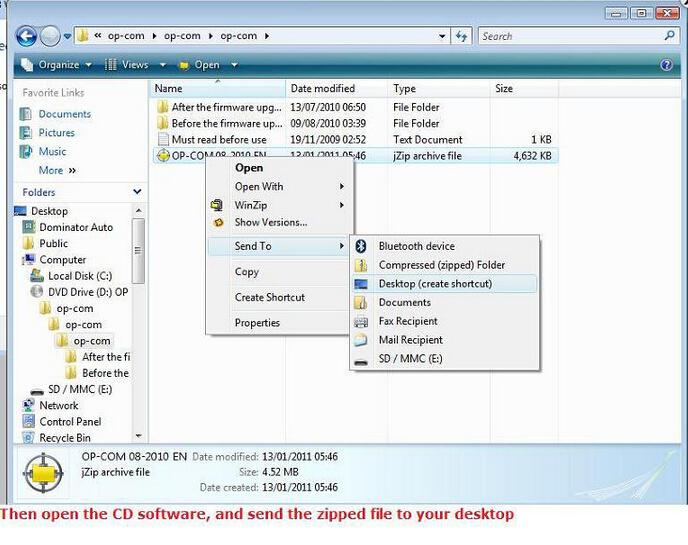
Step 10: then open the CD software, and send the zipped file to your desktop.
Step 11: Double click on the zipped files you have just placed on your desktop.

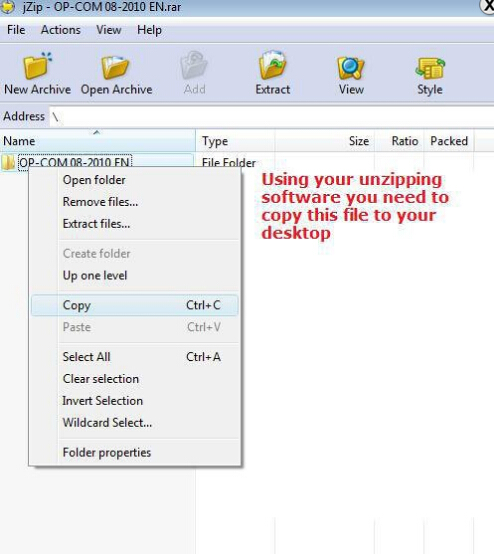
Step 12: Using your unzipping software you need to copy this files to your desktop.
Step 13: Double click on the program OP-COM.
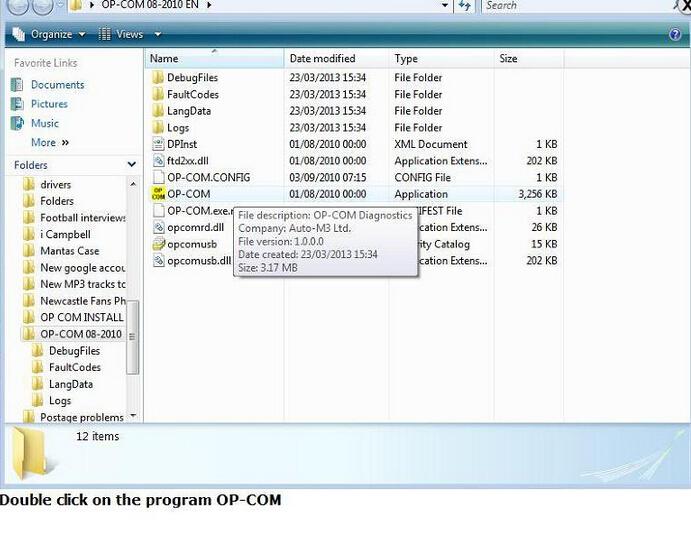
Step 14: make sure the OPCOM device is still plugged and click Settings.

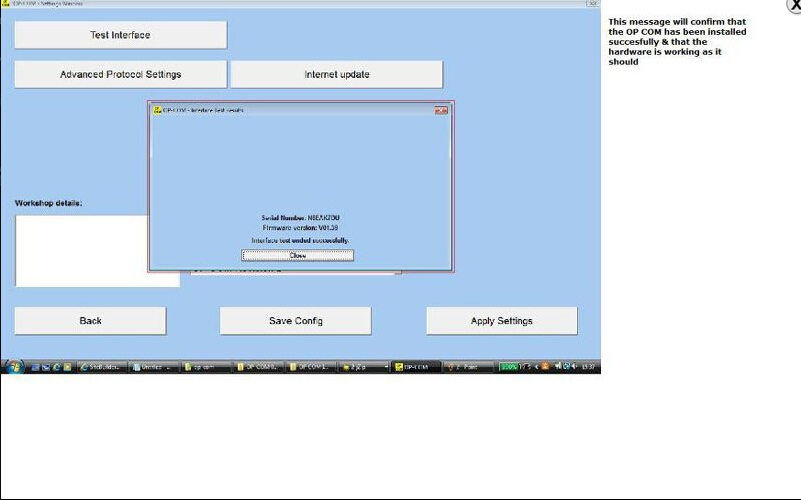
Step 15: Click “Test Interface”

Step 16: This message will confirm that the OPCOM Opel has been installed successfully & that the hardware is working as it should.
When you have installed opcom software,you can read below post to get more skills:
How does OPCOM OP-COM program Opel Corsa C BCM? (Guide)

![] 2024 Xhorse VVDI MLB TOOL XDMLB0 Key Programmer ] 2024 Xhorse VVDI MLB TOOL XDMLB0 Key Programmer](https://blog.uobdii.com/wp-content/uploads/2024/06/SK430-1080.jpg)


