Working with the latest Toyota GEN3 (R7F701216) engine control modules requires precision and the right equipment. Both OBDSTAR X300 Classic G3 and DC706 ECU Tool now fully support these units in Bench mode, providing a reliable solution for cloning and data recovery.
Essential Tooling & Requirements
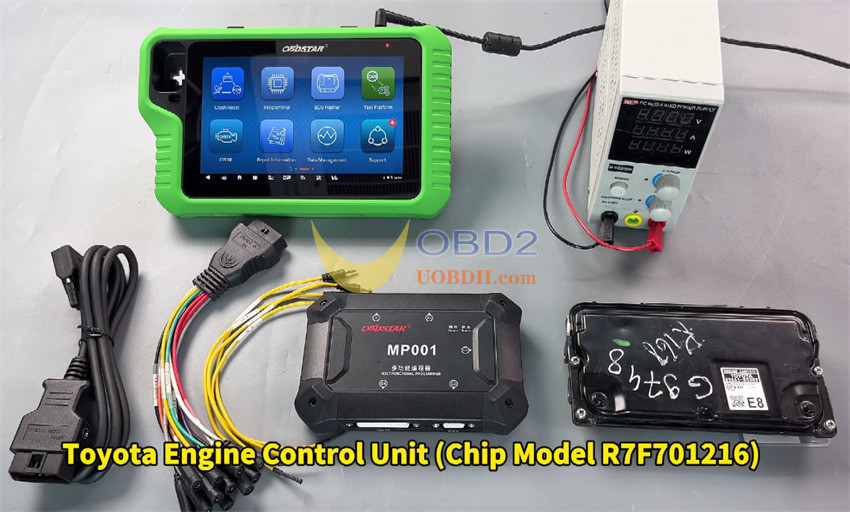
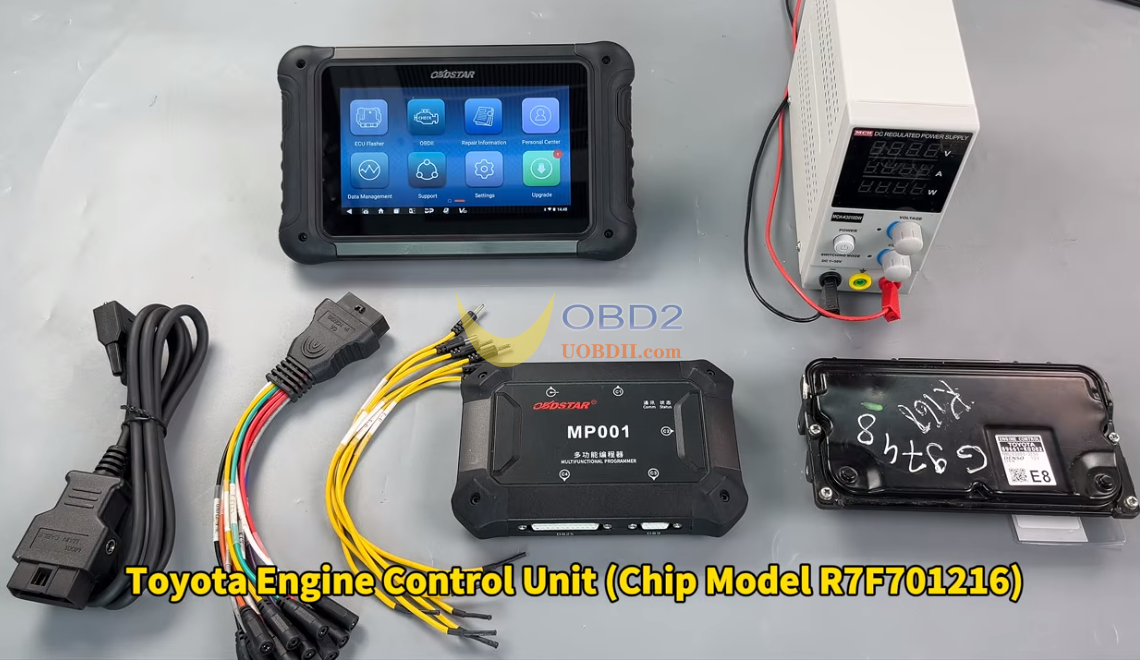
Before starting, ensure your workstation is equipped with:
- OBDSTAR Hardware: X300 Classic G3 (Full Version/OBDSTAR G3+ ECU Flasher License) or DC706
- Interface: MP001 Programmer(Required for this specific protocol).
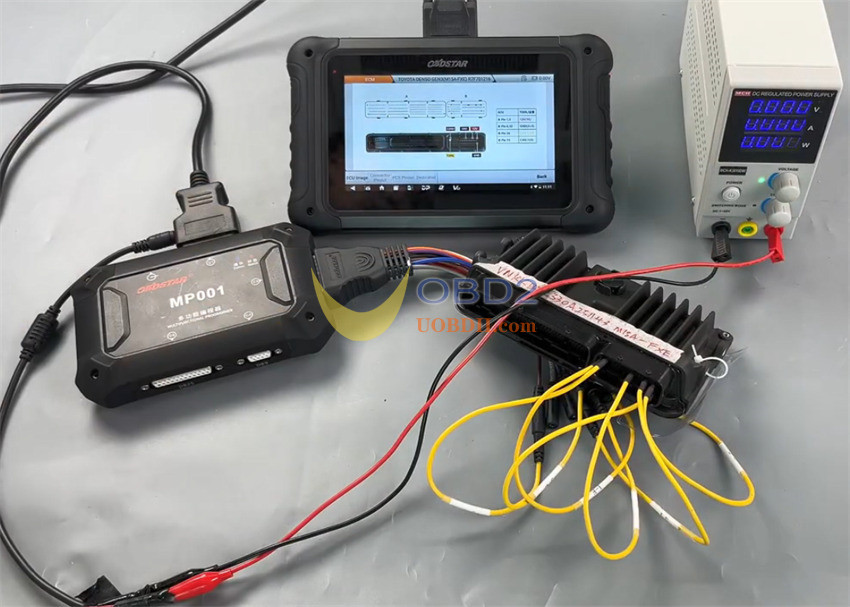
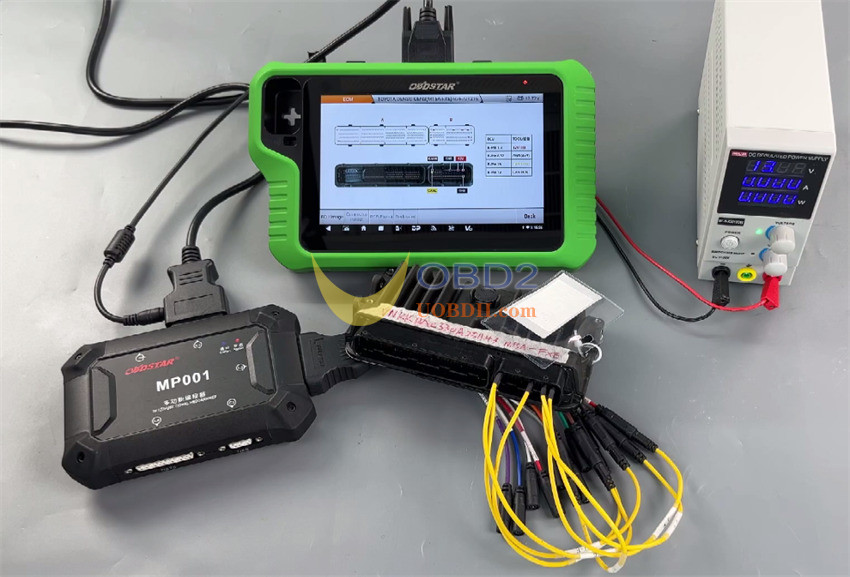
- Power Source: A stable, high-power DC regulated supply.
- Cables: Standard main cable and the necessary jumper wire set.
- The Unit: Toyota GEN3 (R7F701216) ECU.
Operation Workflow
1.Update Firmware: Ensure your OBDSTAR device is running the latest software version to access current ECM databases.
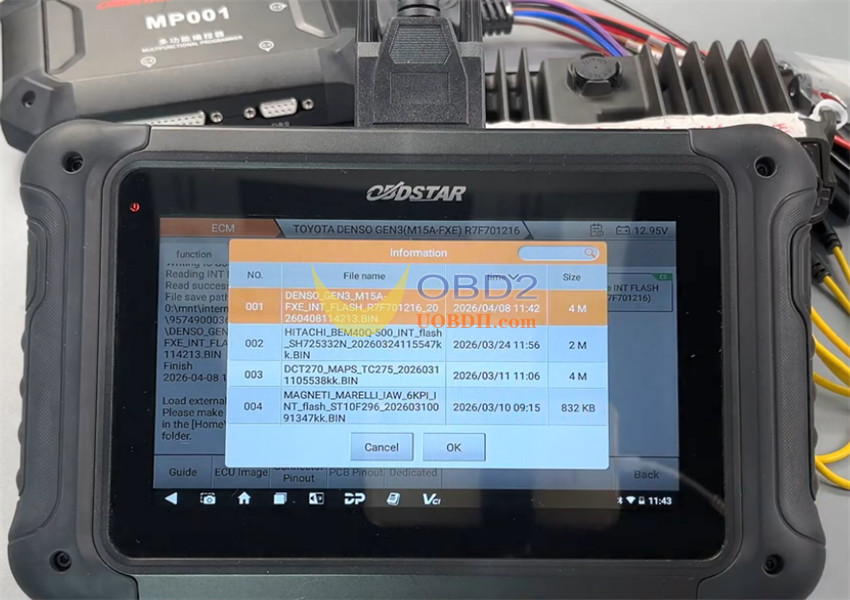
2.Locate Protocol: Navigate to ECU Flasher > ECM > ECM V32.90 .
Use the search box and type “gen3” to filter the results.
3.Select Target: Choose Toyota DENSO GEN3 (M15A-EXE) R7F701216.
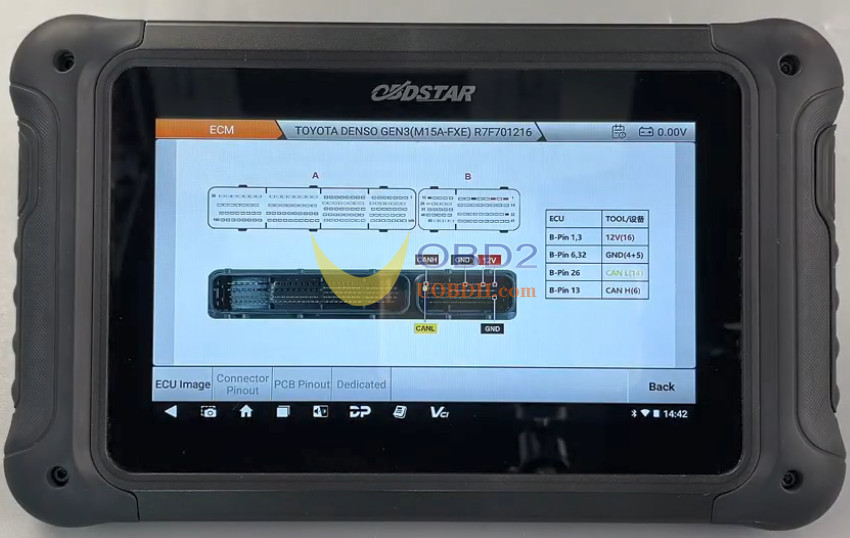
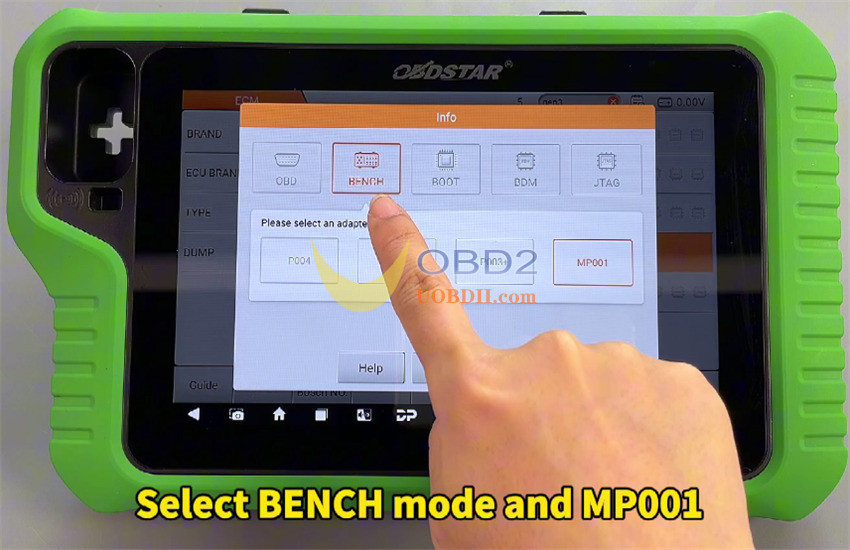
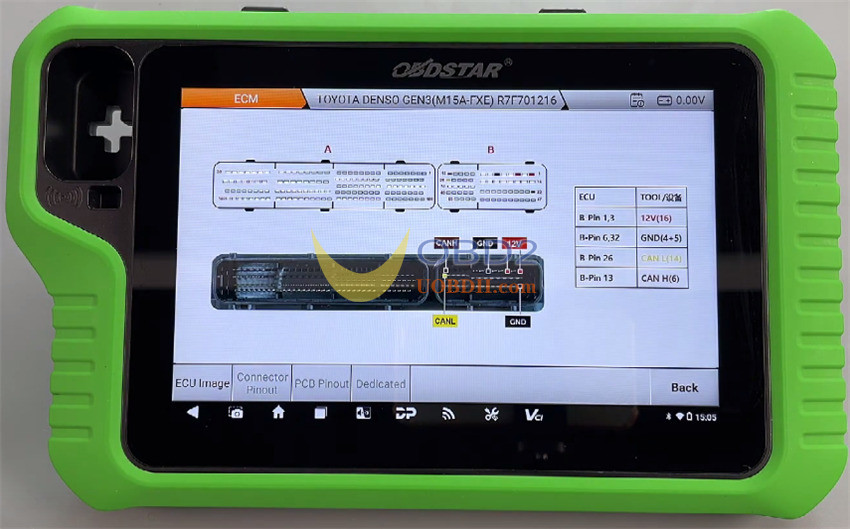
4.Consult Pinouts: Tap “Guide” to review instructions and “Pinout” to visualize the connection. Ensure BENCH and MP001 are selected.
5.Hardware Link: Connect OBDSTAR MP001 Programmer to X300 Classic G3/DC706 ECU Tool and bridge to the ECU using the jumpers provided.
Wiring Configuration (Pinout)
- B-Pin 1&3= 12V (16)
- B-Pin 6&32= GND (4+5)
- B-Pin 26= CAN L (14)
- B-Pin 13= CAN H (6)
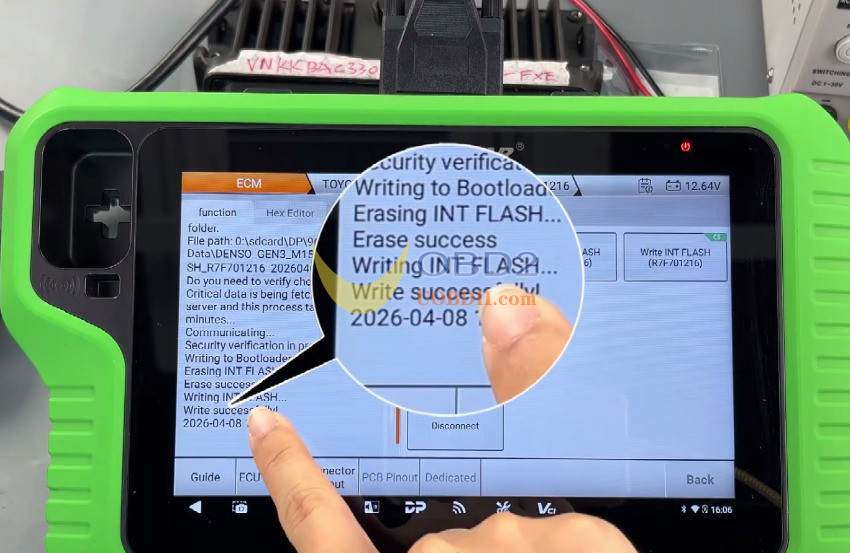
Executing Data Transfer
Note: Maintain constant power to OBDSTAR DC706/ G3 unit throughout this process.
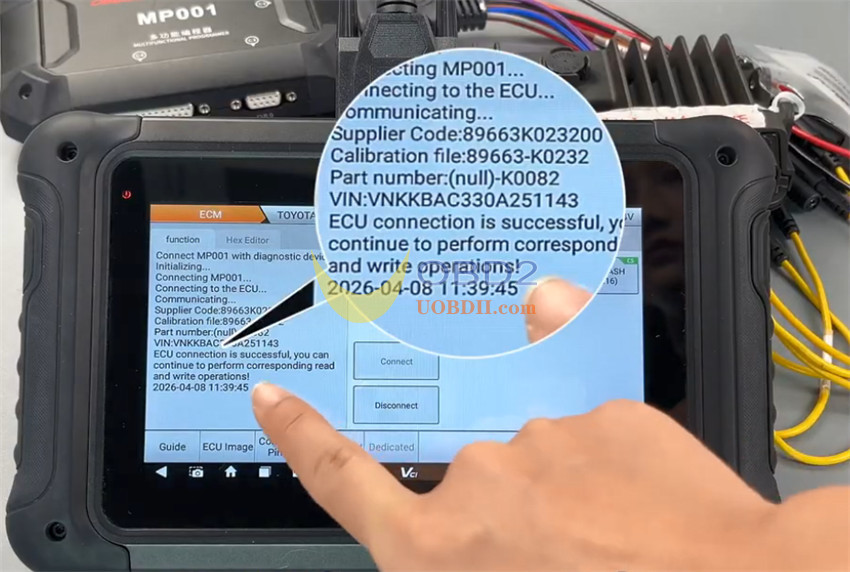
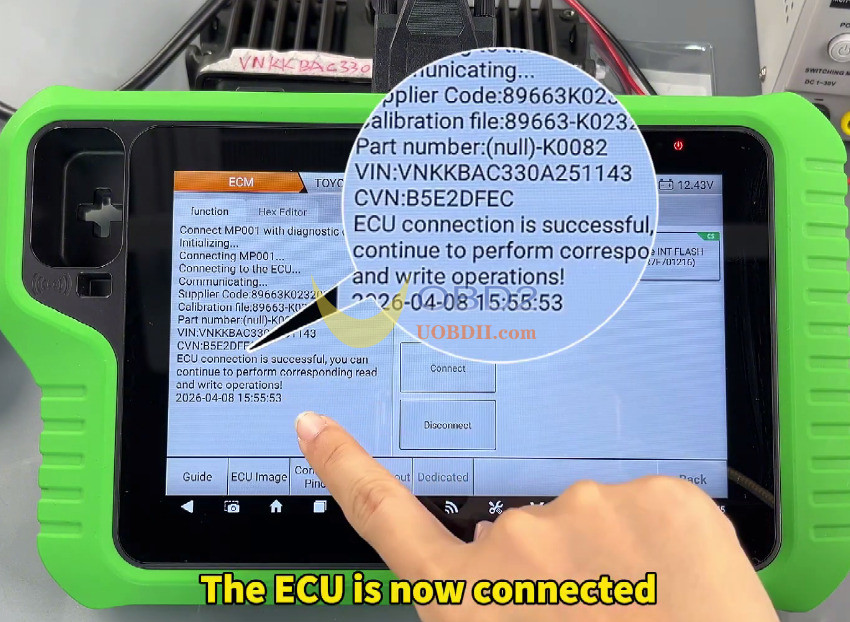
- Connect: Use the software interface to initialize the connection to the ECU.
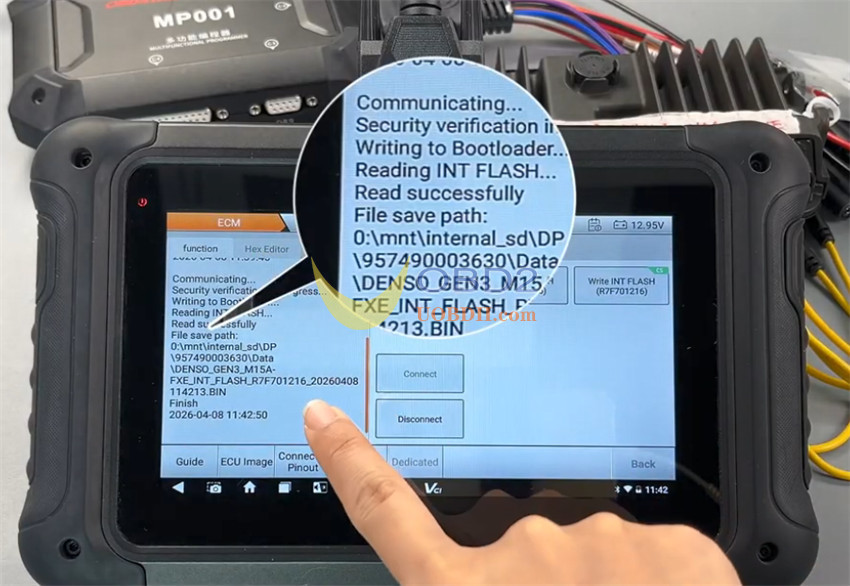
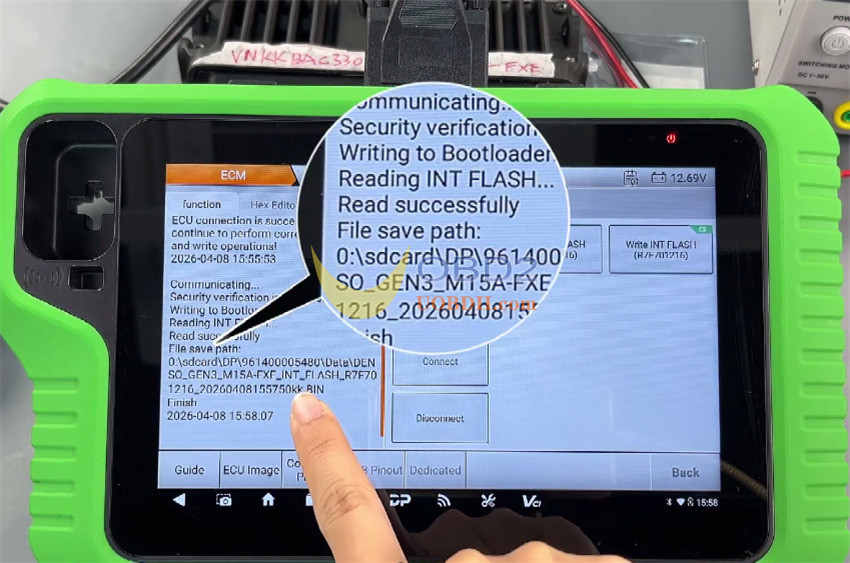
- Read: Extract and save the original INT FLASH (R7F701216) data forbackup.
- Write: Swap connections to the replacement (new) ECU and upload the originaldata to complete the cloning process.
OBDSTAR X300 Classic G3 Read and Write Toyota GEN3 R7F701216
OBDSTAR DC706 ECU Tool Read and Write Toyota GEN3 R7F701216