


Mangoose SDD V142 Verified Working:
On 07-07-2015, JLR Mangoose SDD V142 is verified working well on Chinese JLR Mangoose cable and a video demo is made which show how to install SDD V142 driver.
SDD V142 DVD and software download:
Browse http://diagnosticdelivery.jlrext.com/idscentral
You will see these exe files

Download only these files:
SDD 142.00_FULL.exe
VDF_JA_142.exe
VDF_JV_142.exe
VDF_LA_142.exe
VDF_LV_142.exe
SDD_142.01.exe
SDD_142.02.exe
SPA_142.exe
With these files you can’t install yet, want to run with our JLR Mangoose cable, you need additional “Driver for MangoosePro_JLR” and license key.
https://www.mediafire.com/?o1ohitg1s87bb18
JLR Mangoose Pro SDD V142 Setup Instruction:
If you buy Mangoose Pro cable and software from www.uobdii.com, SDD V142 comes with 3 DVD’s, the CD’s is 99% Executables (.EXE) and a Frozen software to get license key.
OS requirement:
Xp system or XP Mode in Windows 7 (Step-by-step instruction:
http://windows.microsoft.com/en-us/windows7/install-and-use-windows-xp-mode-in-windows-7 ), or vmware XP in windows 7
Disable antivirus software:
Disable both local area connection and wireless connection network, otherwise antivirus software will say virus possibility on the license key software.
Step – by –Step Installation
Part 1:
Insert the first one CD: 142_1. Open DVD Drive, you will find three .exe files including: SDD 142.00_FULL.exe, VDF_JA_142.exe and VDF_JV_142.exe.

- Install “SDD 142.00_FULL.exe”
1). Open “SDD 142.00_FULL.exe”, choose setup language, click “Next” to prepare setup

2). Following the prompt to Install, most will automatically complete install.
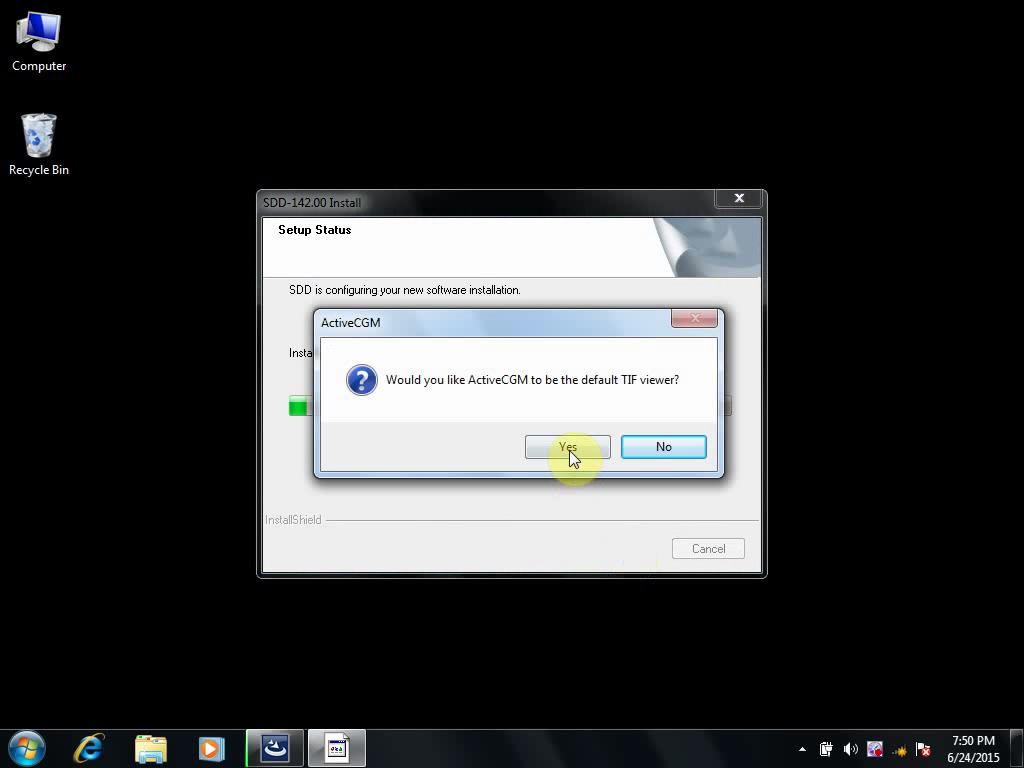
3). ActiveCGM – when a window pops up reading ” Would you like ActiveCGM to be the default TIF viewer?”, click “Yes”.
4). Ready to install DSS application , following the prompt to complete.
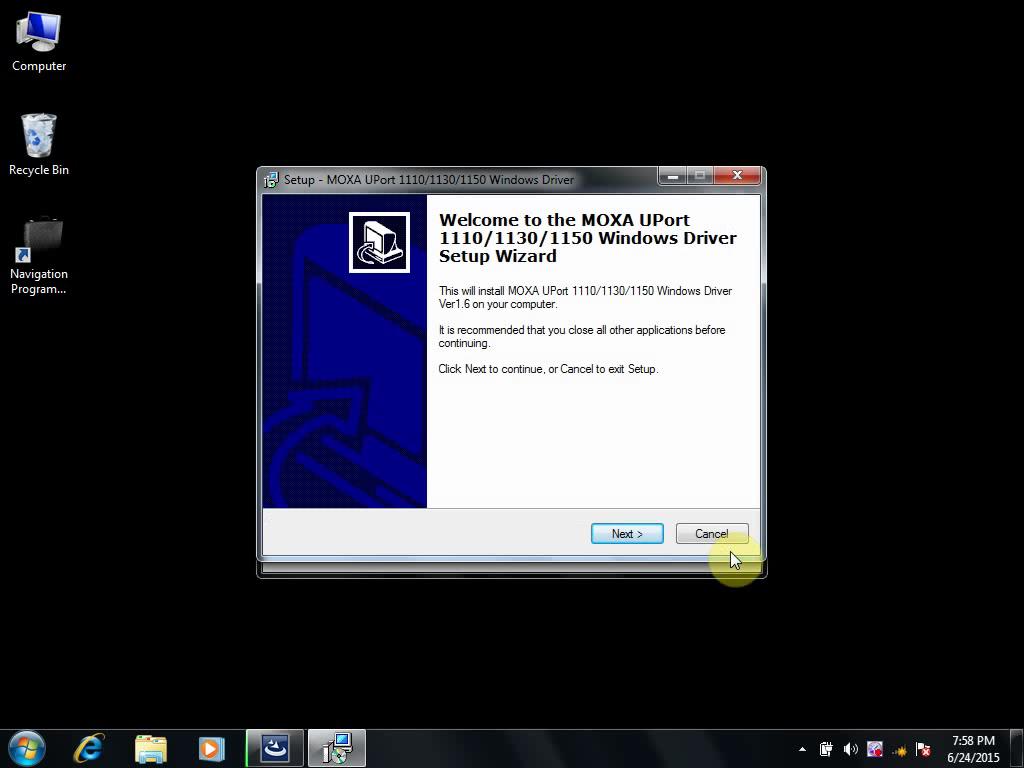
5). Intall MOXA UPort 1110/1130/1150 Windows Driver Ver1.6 on your computer.
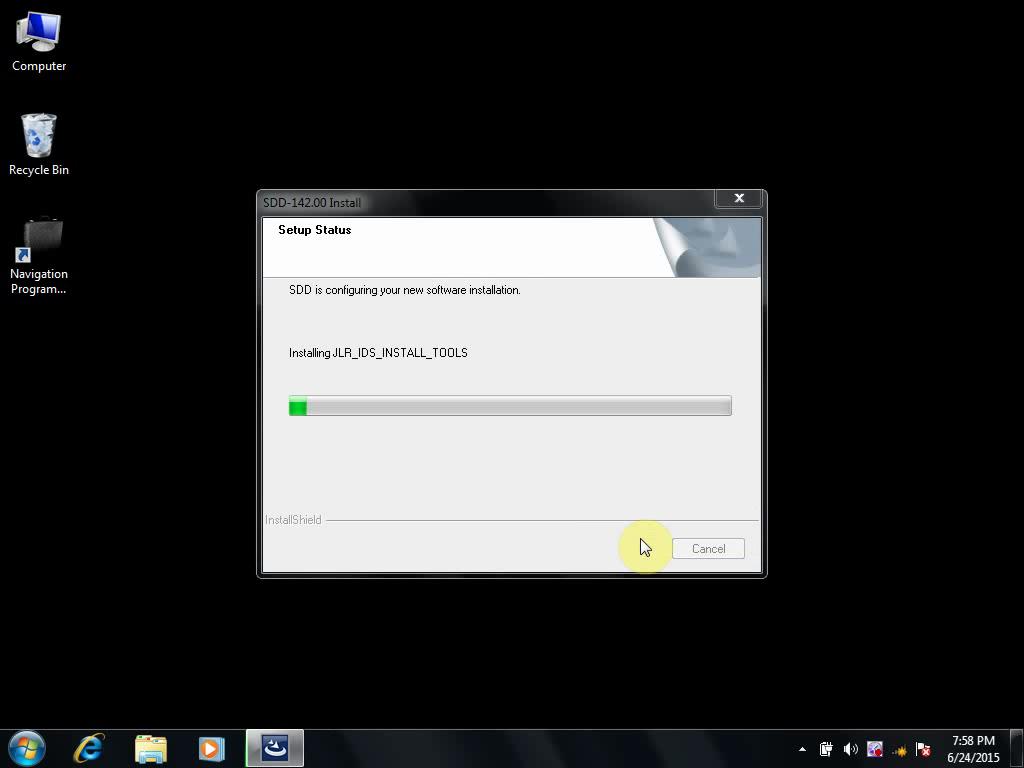
6). Install JLR_IDS_INSTALL_TOOLS
7). Now SDD 142.00_FULL is successfully installed. Restart the computer.
- Install “VDF_JA_142.exe”
1) Open DVD Drive, find out “VDF_JA_142.exe” and open it.
2) Choose language.
3) VDF_JA will automatically complete install.

4) Restart the computer.
- Install “VDF_JV_142.exe”
1) Open DVD Drive, find out “VDF_JV_142.exe” and open it.
2) Choose language
3) VDF_JV will automatically complete install.
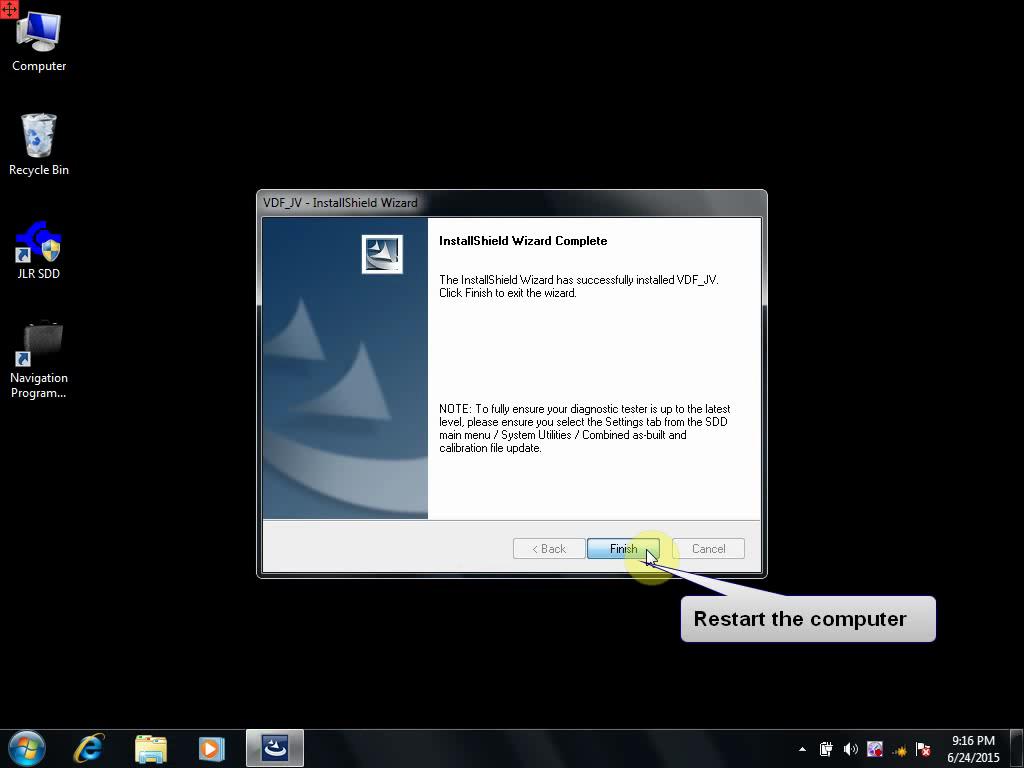
4) Restart the computer.
Part 2: Insert the second CD: SDD v142_2
1). Open DVD Drive, you will see two files including: VDF_LA_142.exe and VDF_LV_142.exe.

2) Open “VDF_LA_142.exe”
3) Choose Language
4) VDF_LA will automatically complete install
5) Restart the computer.
6) Open “VDF_LV_142.exe” and use the same way to complete install.
Part 3: Insert the third CD: SDD v142_3
1) Open DVD Drive, you will see three application files including: SDD_142.01.exe, SDD_142.02.exe and SPA_142.exe.
2) Click “SDD_142.01.exe” to install, if one window pops up prompt Adobe Reader is out of date, click “OK”, then SDD_142 will automatically install till update complete, click “Finish.
3) Restart the computer.
4) Follow the same way to install “SDD_142.02.exe” and restart the computer.
5) Install “SPA_142.exe”, when a window named “Additional Pinpoint Tests” click ok. Click “”Additional Pinpoint Tests” and waiting to complete install.
Part 4: Install Driver
1) Insert the first one CD
2) Open folder “Driver”
3) Click “Driver for MangoosePro_JLR” to install
4) Following the prompt to install J2534 MangoosePro JLR, then a window will pop up advising you attach your device to this computer any time after the installation has finished, click “OK”

5) Completed the J2534 MangoosePro JLR setup wizard.
Part 5: Test communication
Plug MangoosePro JLR device into the computer, and to check if SDD driver is detected by this computer.
Click Computer – Management – Device Manager, you will see MangoosePro JLR J2534 Interface, it means the MangoosePro JLR device is connected and ready for use.

Part 6: Ready to diagnose.
Note: the following test steps are based on SDD test version, later I will show how to install froze software and get license key.
1) Click icon “JLR SDD” on the desktop and Launch SDD to be ready to diagnose.
2) When the window pops up saying “Offline login is not available”, click “Continue”

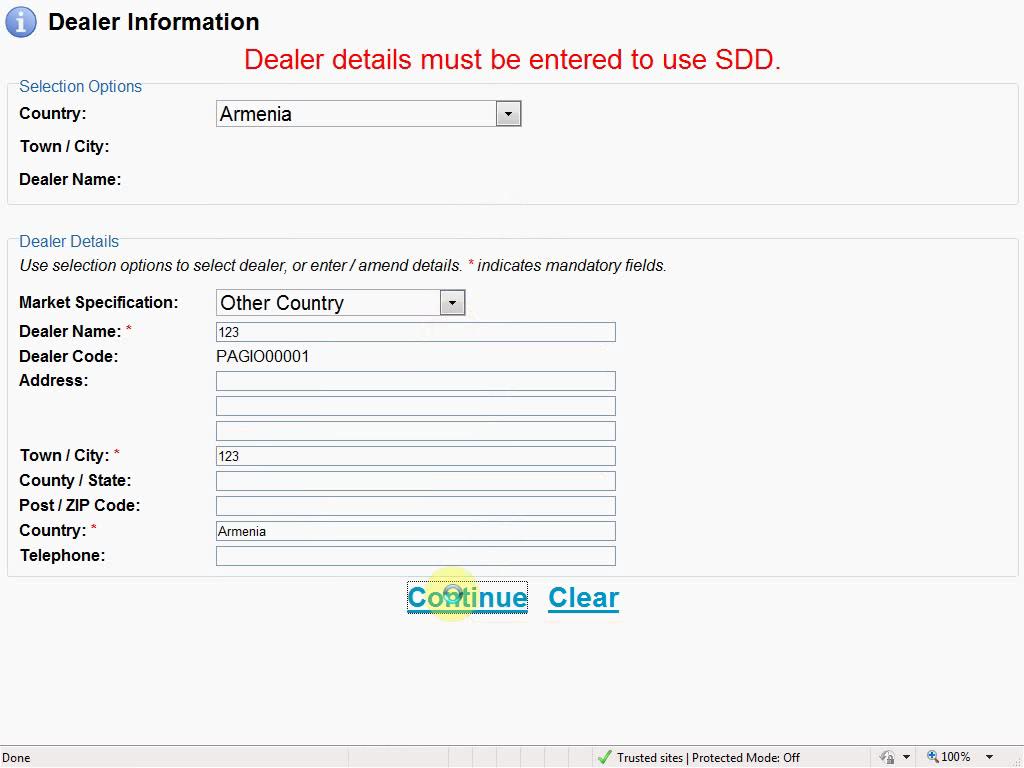
3) Fill in Dealer information
4) Click ” Auto VIN Read” to read VIN automatically.

5) Please note the red color words at the top line.

6) Vehicle instrument cluster, choose “Low line instrument cluster” , click Save.
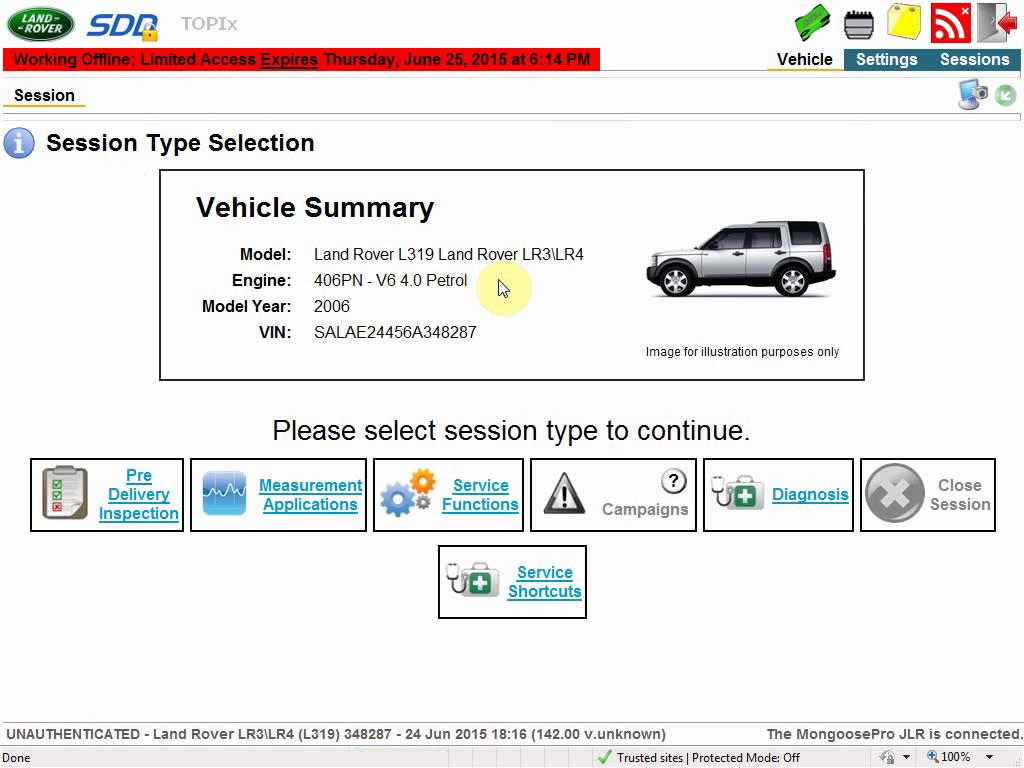
7) come to Session Type Selection, you will see vehicle detailed information, click “Diagnosis”.
8)Symptom Selection, choose ECU and parts to read out fault codes.

9) Finish diagnose, stop the application.

Part 7: install Deep Freeze software and get license key.
1) Insert the firt one CD: 142_1
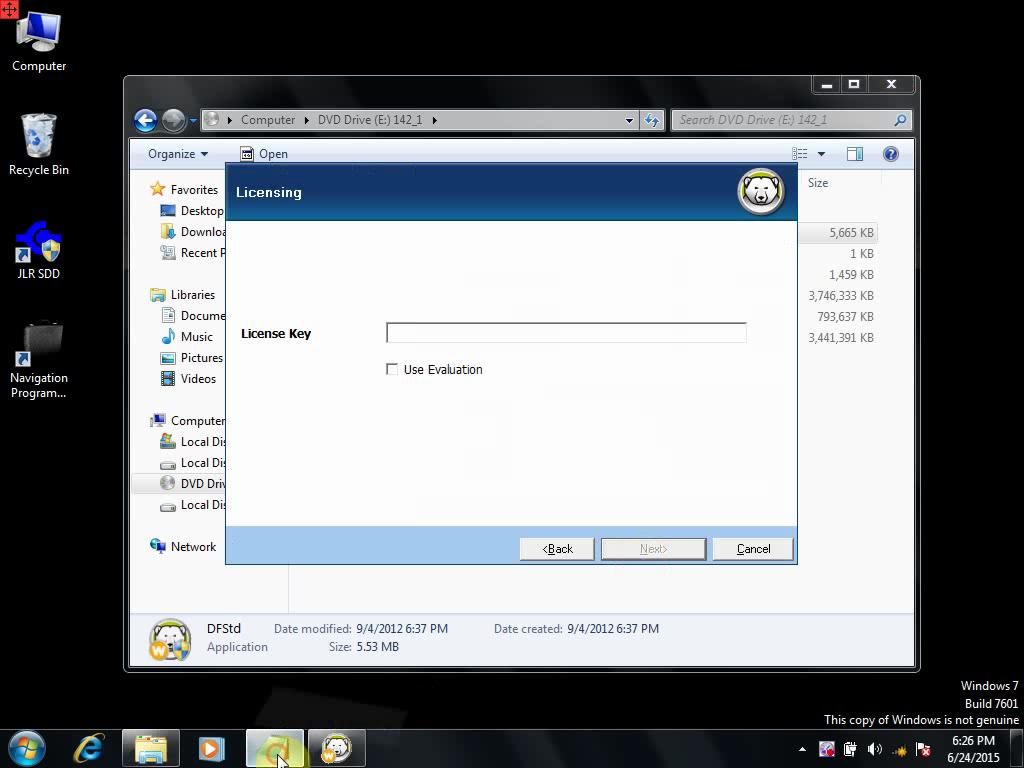
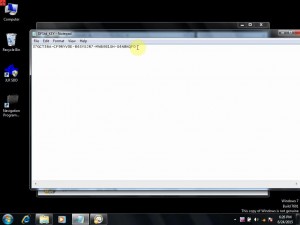
2) Click “DFStd” to opne and install “Deep Freeze Standard Installation”, click “Next”, then it needs license key, to open another text file “DFStd_KEY” and copy the key, then paste into the blank box, click “Next”
2) Come to Frozen Drives Configuration, do not tick off D: and F: , click “Next”.
3) Ready to install Deep Freeze.
4) Restart the computer.
Now, you will always be accissible to SDD software.
Done
Wish it helps.
