


OBDSTAR x300 DP tablet key programmer can diagnose the electronic control system of prevailing vehicle models covering Asian, European, American and Chinese. Diagnosis functions include: Read DTCs, Clear DTCs, Read data stream, Special functions etc.
DIAGNOSIS FLOWCHAT
For new users, follow the operation below to get familiar with and start using X300 DP.
VCI diagnostic connector VCI –> Bluetooth connection (USB connection) –> user registration –> user login –> download or upgrade software –> select function or vehicle type –> proceed diagnosis
STEP1: connect VCI connector:
1. Locate vehicle’s DLC socket. The DLC (Data Link Connector or Diagnostic Link Connector) is the standardized 16‐cavity connector where diagnostic code readers interface with the vehicle’s on-board computer. The DLC is usually located 12 inches from the center of the instrument panel (dash), under or around the driver’s side for most vehicles. If Data Link Connector is not located under dashboard, a label should be there telling location. For some Asian and European vehicles, the DLC is located behind the ashtray and the ashtray
Must be removed to access the connector. If the DLC cannot be found, refer to the vehicle’s service manual for the location.
2. Plug the VCI diagnostic connector into the vehicle’s DLC socket (It is suggested to use
the OBD2 extension cable to connect VCI connector and DLC socket.). For non‐16PIN DLCsocket, please select the corresponding non‐16 pin connector adapter, then plug the non‐16pin end of the adapter into the DLC socket, and then connect the standard 16pin end VCI connector.
STEP2: BLUETOOTH SETTING
1.Enter Key Master to set System setting, and choose VCI information.
2.Operate according to following prompt:
A.“Please match: VCI_888888888888(Bluetooth name)”
B.“Connected: VCI_888888888888(Bluetooth name)”
C.“Not connected: VCI_888888888888(Bluetooth Name)” Please connect VIC connector tovehicle, X300 DP will connect automatically.
STEP3: User registration
Click “DP” icon to enter diagnostic software, select “the user infromation” in “Settings” menu, then enter user registration window. Picture shown as below:
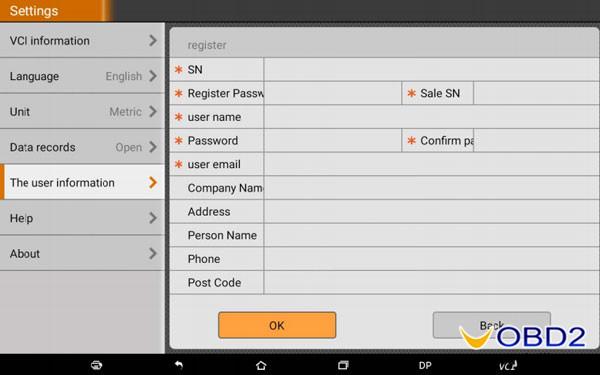
You sould fill in the information in each field (items with * must be filled). After inputting, tap”OK” if you have registered to be a member, click “the user information” to enter user login page:

STEP4: Download or upgrade software
Tap “One Key Upgrade” to enter one key upgrade page

Tap “One Key Upgrade” to start downloading, enter main interface after finishing downloading.
(Notes: Ensure internet connection is normal when updating. Besides, because of many software, it may take several minutes, wait patiently!)
If need to cancel a software, just tap corresponding Check Box as following picture shown:

STEP5: Start diagnosing
Tap on the main menu screen and choose “DP” to enter the function selection and vehicle selection page. Pic:

Here take OBDII as an example to introduce how to start diagnosing.
Firstly, choose “OBDII” option and tap the “OBDII” icon

Then select software version “OBDII V30.05”

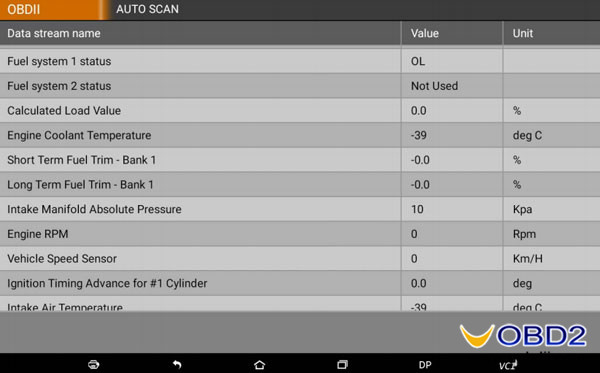
And select “AUTO SCAN”

Enter diagnostic function menu
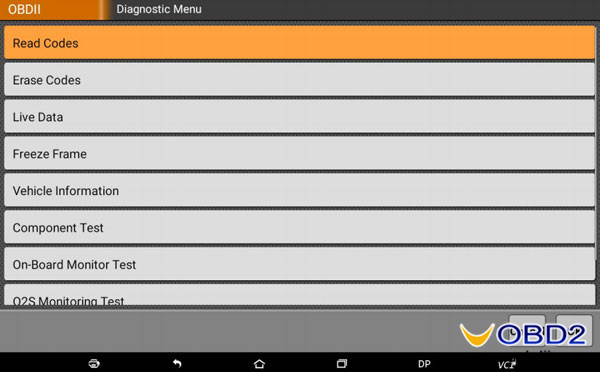
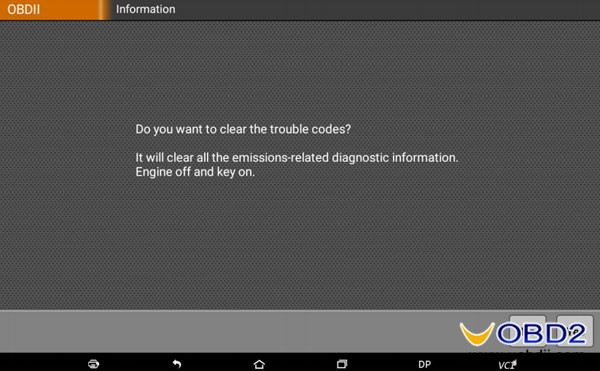
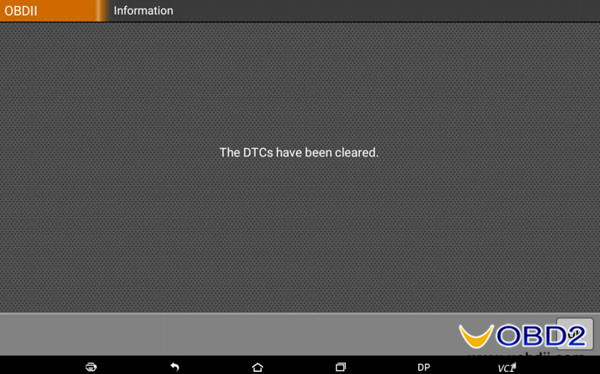
Then you can Read trouble codes, erase codes, read live data, read vehicle information, test on-board monitor and so on.

Besides diagnostic functions, the most powerful function of OBDSTART X300 DP is immo key programming function.
Example. X300 DP do all key lost for Toyota with G.
https://blog.uobdii.com/how-obdstar-x300-dp-do-all-key-lost-for-toyota-with-g-via-obdii/
