


This is a guide for BMW coding enthusiast DIYers to build a BMW ENET cable by themself.And you need to install BMW E-sys and connect this BMW ENET cable to your BMW,then run the software to perform BMW coding.
What Tool You Need?

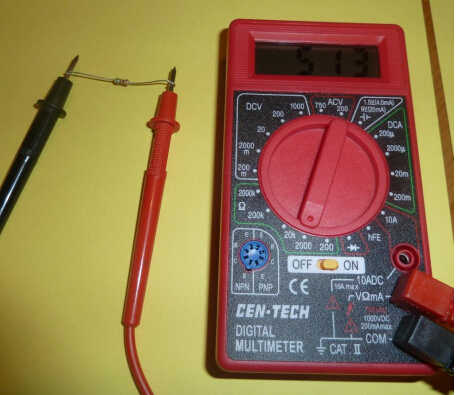
These are the tools I use to make my cables. The only specialty tool is the network cable crimper. I’m using a simple and cheap multimeter to show that you don’t need anything special to test your cable. The only thing missing from the picture is the OBD2 connector.
BMW E-sys Coding software download check here:
Newest BMW E-sys 3.33.0 3.32.1 Free Download
And if you don’t get a BMW ENET Cable with BMW E-sys software tested right now,buy it here:
BMW ENET (Ethernet to OBD) Interface
First I test the resistor to make sure it doesn’t fluctuate all over the place. So long as it sits stable
between 506 and 560 ohms you are set.
I use 510 ohm, 1/4 watt resistors, but other people have used 560 ohm, 1/4 watt resistors andbeen perfectly fine.
Next put on the RJ-45 boot and OBD2 connector cable protector. You don’t want to crimp the RJ-45 or solder your OBD2 connector only to find out you forgot to put these on the cable first.
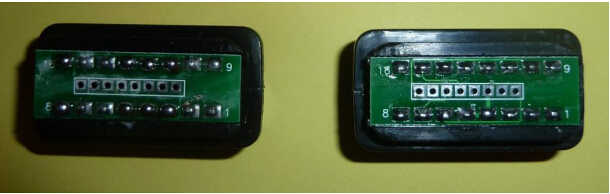
Next I prepare the OBD2 connector. The connector on the right is how I receive them from China. I then add more solder to the individual pins by tinning each one (left connector). You can also see that there are numbers on the connector. This makes determining what pins your working with pretty much idiot proof. You could also feed the wires through the holes in the board and solder them to the pins on the other side. I don’t do this because it’s not as simple a process as soldering directly to the pins here.

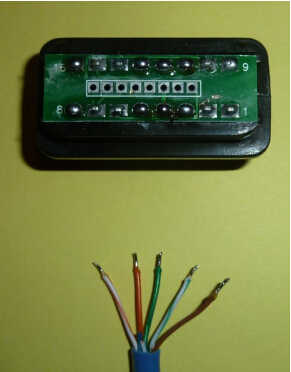
This shows the wires we’re going to be using to connect to the OBD2 connector. In this instance we’re using CAT5e cablingand I’ve already completed the tinning of the wires. You shouldn’t strip very much casing off the wires. I cut the unused wires at differing lengths to prevent shorting.
OBD connector to RJ45 wire harness diagram:

The wiring steps are:
White with Green Stripe – Pin 3
Brown – Bridges Pins 4&5
Green – Pin 11
White with Orange Stripe – Pin 12
Orange – Pin 13
I think the important thing is not to get wrapped up in the coloring. So long as you get the same wires connected between the OBD2 and RJ-45 you’ll be OK.
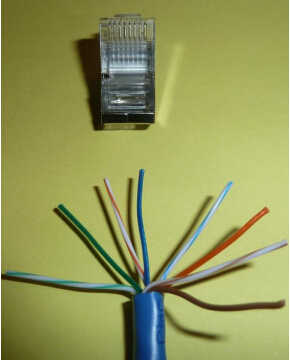
Here’s the RJ-45 side. You’ll insert the wires into the RJ-45 with it positioned like it is in the picture.
The wiring steps are:
White with Green Stripe – Pin 1 (Left Side)
Green – Pin 2
White with Orange Stripe – Pin 3
Blue – Pin 4 (Unused)
White with Blue Stripe – Pin 5 (Unused)
Orange – Pin 6
White with Brown Stripe – Pin 7 (Right Side)
Brown – Left out of connector (See next picture)
Here the wires are threaded into the RJ-45 but not crimped yet. You can see the brown wire sitting outside of the connector. We’ll use this wire to ground the OBD2 connector to the shielded RJ-45, which in turn will ground to the NIC casing and frame of your computer or laptop. Many people ignore this step and their cables function just fine. I just wanted to be sure I followed the schematic as closely as I can.
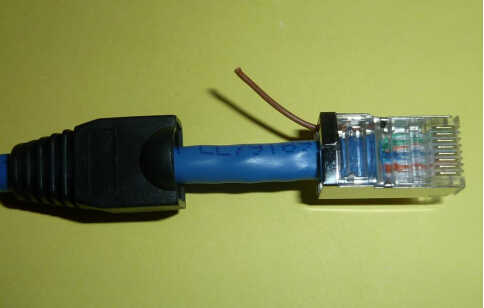
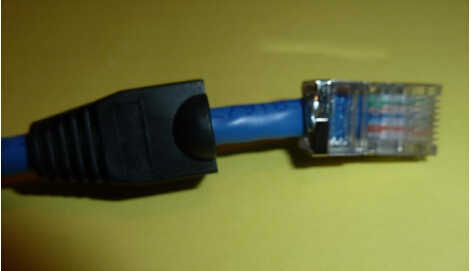
Here’s the completed RJ-45. The brown wire is soldered to the shielded casing of the RJ-45 and ready to be covered by the connector boot
On to the OBD2 connector now. This is where the bulk of your soldering will be.
You shouldn’t worry about your soldering skills because no one else is going to see your work. That and its going to be covered by the casing of the OBD2 connector.
I’ve soldered on the 510 ohm, 1/4 watt resistor to connect pins 8 and 16 together.
That was easy!

Here’s the brown (pins 4 & 5) and white with green striped wire (pin 3) soldered.
They are connected on the RJ-45 side to the metal casing and pin 1 respectively.
Alright, we’re almost there. Here’s the Green (pin 11), white with orange stripe (pin 12) and orange (pin 13) soldered. They are connected on the RJ-45 side to pin 2, pin 3 and pin 6 respectively

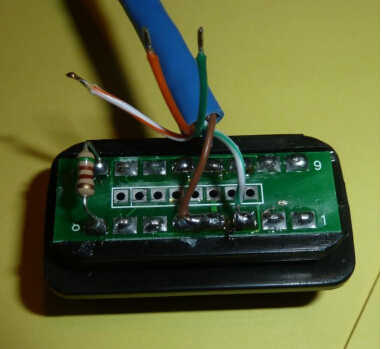
Large picture of all the connections on the OBD2 connector side. I always add additional solder to the connections after initially connecting them to be sure there’s no way they will disconnect from everyday use. All you need to do now is use your multimeter to make sure you have good continuity in the wires between the OBD2 connector and RJ-45; and that the resistor is registering the correct ohm reading. See that was easy!


Done!
